
Here’s the ugly truth: cloud storage is a ticking financial time bomb, and your camera roll is the collateral. I’ve watched friends lose a decade’s worth of family videos because a tech giant decided to lock their account, raise subscription fees, or suffer a silent data purge. Trust me on this—relying entirely on remote servers you don’t physically own is a rookie mistake. You need total physical control over your digital life. If you are tired of monthly storage fees and want an ironclad, offline archive, you are in the right place. Today, I am breaking down the exact step-by-step method to backup mobile photos directly to external drives, entirely bypassing the computer middleman.

- • The Hardware Reality Check: What You Actually Need
- • Android vs. iOS: Understanding Your Operating System's Quirks
- • Step-by-Step Execution: Moving Your Photos Without a Computer
- ↳ Step 1: Prep and Power
- ↳ Step 2: Establish the Destination Folder Structure
- ↳ Step 3: Select and Transfer in Batches
- ↳ Step 4: Verify the Integrity of the Transfer
- • Advanced Tips for Maintaining Your Offline Archive
- ↳ Can I plug an external hard drive directly into my smartphone?
- ↳ Why won't my iPhone recognize my external hard drive?
- ↳ Should I delete photos from my phone right after backing them up?
- ↳ Do I need an app to transfer photos to an external drive?
Key Takeaways & Quick Overview
AI Verified
- ✔Here’s the ugly truth: cloud storage is a ticking financial time bomb, and your camera roll is the collateral.
- ✔I’ve watched friends lose a decade’s worth of family videos because a tech giant decided to lock their account, raise subscription fees, or suffer a silent data purge.
- ✔Trust me on this—relying entirely on remote servers you don’t physically own is a rookie mistake.
- ✔You need total physical control over your digital life.
The Hardware Reality Check: What You Actually Need
Let’s clear the air right now. You cannot just plug any old thrift-store hard drive into your iPhone or Android and expect magic to happen. Mobile operating systems are notoriously stingy with power output and file system compatibility. If your external drive requires a wall outlet or formats using proprietary Windows-only structures like NTFS without third-party drivers, you are dead in the water.
I learned this the hard way back in 2018 when I tried plugging a heavy desktop mechanical drive into my tablet using a cheap adapter. Result? A total power drop and a minor panic attack. Don’t repeat my mistakes.
- Portable Solid-State Drives (SSDs): Buy a pocket-sized SSD. Brands like Samsung (T7 series) or SanDisk (Extreme) draw minimal power and handle drops far better than traditional spinning disks. According to industry specifications managed by groups like NAND flash memory standards bodies, solid-state architecture is vastly superior for mobile, on-the-go data manipulation.
- The Right Cables and Adapters: Your phone uses USB-C or Lightning. Most modern portable drives use USB-C. Get a certified cable. If you are on an older iPhone with a Lightning port, you will need Apple’s official Lightning to USB 3 Camera Adapter to supply supplemental power.
- File System Formatting: Format your drive to **exFAT** before you start. Why? Because exFAT plays nice with both Android, iOS, Windows, and macOS without file size limitations. FAT32 is too outdated (fails on files over 4GB), and Apple’s APFS won’t read properly on standard Android setups without heavy tinkering.
Android vs. iOS: Understanding Your Operating System’s Quirks
The workflow changes drastically depending on the glowing rectangle in your pocket. Apple keeps its walled garden locked down tight, whereas Android lets you roam free in the file system—sometimes right into a ditch.
On Android, the process is delightfully boring. You plug the drive in, open your native “Files” app or a reputable third-party explorer like Solid Explorer, locate your DCIM folder, select your images, and hit copy. Boom. Done. No fuss.
Apple users, however, have to jump through a few more bureaucratic hoops. iOS treats external drives as external volumes within the native “Files” app. You cannot natively export your entire Photos library database file directly through the standard gallery app without exporting them as uncompressed JPEGs or HEICs first. It is tedious. But it is bulletproof.
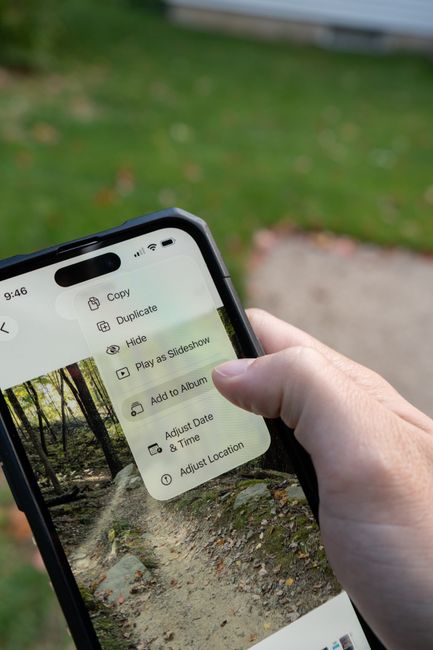
Step-by-Step Execution: Moving Your Photos Without a Computer
Let’s get our hands dirty. Follow this sequence precisely to ensure zero data corruption or lost files.
Step 1: Prep and Power
Charge your phone to at least 50%. Heavy file transfers consume processor power and drain batteries fast. If your phone dies mid-transfer, you risk corrupting the file allocation table on your external drive. Plug your external SSD into your phone using the appropriate cable. A small indicator light on the drive should blink to life.
Step 2: Establish the Destination Folder Structure
Open your mobile file manager (Files app on iOS/Android). Tap on the external drive. Create a structured folder hierarchy before moving anything. I suggest naming a master folder “Phone_Backup_YYYY-MM-DD” so you never accidentally overwrite old archives. Organization saves sanity.
Step 3: Select and Transfer in Batches
Do not attempt to dump 80,000 photos at once. Mobile processors will thermal-throttle, apps will crash, and you will stare blankly at a frozen progress bar wondering where your life went. Instead, break your library down into yearly or monthly batches.
Select the target images in your phone’s photo gallery or internal storage, choose the “Share” or “Move to” option, navigate to your external drive, and drop them into your newly created folder. Watch the progress bar crawl. Breathe.
Step 4: Verify the Integrity of the Transfer
Never delete photos from your phone immediately after a transfer. That is professional amateur hour. Open a handful of random files from the external drive on your phone. Zoom in. Play the accompanying Live Photos or short videos. Make sure the thumbnails load and the files aren’t zero-byte ghosts. Once verified, you can safely purge them from your mobile device to reclaim that precious internal storage.
Advanced Tips for Maintaining Your Offline Archive
You’ve done the heavy lifting. Now, how do you keep this system from collapsing into chaos next year?
I maintain what I call the dual-drive rotation strategy. Never trust a single piece of hardware. Hard drives fail when you least expect it—usually right after you smugly proclaim how well your setup works. Buy two identical external SSDs. Perform your mobile backup on Drive A, then immediately clone or duplicate that backup onto Drive B. Store Drive B in a completely different physical location, like a fireproof safe or a drawer at your workplace.
Furthermore, check your drives every six months. Plug them in, spin them up, read a few files. Flash memory can lose charge over decades of absolute darkness, though modern SSDs are remarkably resilient compared to old magnetic platters. Review the USB-C specification overview if you experience connection drops; often, a buildup of pocket lint in your phone’s charging port is the culprit behind intermittent transfer failures.
Stop feeding big tech your monthly subscription tithes just to keep your own memories accessible. Take matters into your own hands, grab a pocket SSD, and reclaim your digital sovereignty today.
Frequently Asked Questions
Can I plug an external hard drive directly into my smartphone?
Yes, absolutely. Most modern Android phones and iPhones (iPhone 15 series and newer, or older models with the Lightning-to-USB adapter) natively support external USB drives formatted to exFAT or FAT32.
Why won’t my iPhone recognize my external hard drive?
This is usually due to power limitations or incorrect formatting. iOS requires drives to be formatted in exFAT, FAT32, APFS, or Mac OS Extended. If the drive draws too much power, you will need a powered USB hub or Apple’s official Lightning to USB 3 Camera Adapter.
Should I delete photos from my phone right after backing them up?
Never delete them immediately. Always verify the integrity of the files by opening and viewing a random selection of transferred photos directly from the external drive before performing any deletions on your mobile device.
Do I need an app to transfer photos to an external drive?
No extra apps are strictly required. Both Android and iOS feature native file manager applications (“Files”) that allow you to copy, move, and paste items between internal storage and connected external volumes.